How-tos – Sticks & Stones

Archive

Category Archives for "How-tos"

Frost Under the Flower Moon

Spring in Michigan is always a temperamental time. One day it’s sunny and 70, and the next day it’s snowing. Drop the words “frost free date” anywhere in a Google search and you can get the average date predicting when it’s safe to plant.  The problem with averages is that they come from data on both sides of the average and using this date could leave you frost-burnt as frequently as half the years.

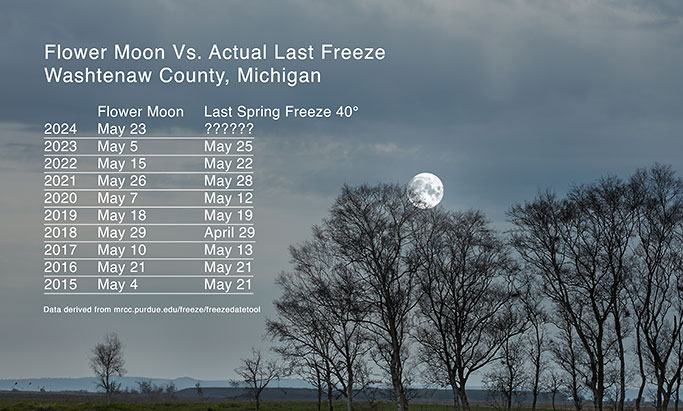
Here at Christensen’s, the full moon in May, or the ‘Flower Moon’ is something we always keep top of mind along with the average frost-free dates. Each spring, we take out our calendars, look for this ever-changing date, and wait patiently. The reason being is that many in our nursery believe that until we are past this milestone, we are still at risk of a frost. Sometimes we get lucky, and this turning point is early, and in other years- like this one, it is late.

The full moon in May was named, as other monthly moons were, by Native American tribes. In regions that were covered in carpets of flowers, the commonly used name of Flower Moon was coined. Other Native American cultures used different names based on what was occurring around them at that time such as Corn Planting moon or Blossom moon. This full moon paired with a clear night has long been believed to bring bitterly cold and unseasonable weather with the threat of hard frosts. The best example of this was the 2020 Flower Moon which brought a cold snap that extended for several days.

Depending on your source, some people believe the Flower Moon is a strong indicator, while others believe it is a long-held myth.  While researching we contacted our favorite local source for all things horticulture, Michigan State University, and asked if they knew of any scientific source that could prove or disprove the moon’s effect on frost. One response was that there isn’t much research on the connection.  Another thought is that it is likely a timing thing – which leads to conclusions that may or may not be able to be proven.
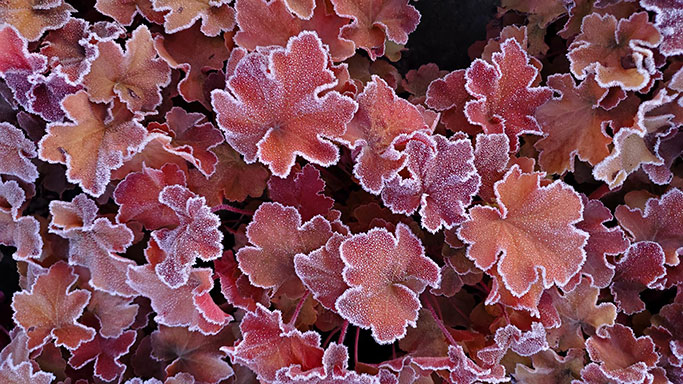
Whether you believe in the Flower Moon or not, we can all agree that, for us in the horticulture industry, a sudden burst of cold weather can be very bad news.  It is dangerous to fresh foliage, buds, and flowering trees.

As you probably know, plants spend the winter in a sleep called dormancy. This dormant period naturally hardens off your shrubs and perennials to withstand the harsh winter temperatures. However, once your plants start to emerge in the spring, we become concerned about colder temps. There are 3 types of freezes issued by the National Weather Service- Frost, freeze, and hard freeze. A frost- sometimes called ‘Killing Frost’ is just frozen dew. Water on the ground, and on the leaves of plants become frozen when temps fall into mid-30s, and winds are calm. A freeze is when temps are at 32 degrees and conditions such as wind prevent the formation of frost. Lastly, a hard freeze is the most serious and occurs when temps drop below 28 degrees for an extended period. It is worth noting that the length of freeze overnight matters. A 1-hour freeze before sunrise is not as worrying as an hours long freeze in the middle of the night. All types of freeze warnings must be recognized, and a plan of action set in place.
The Flower Moon this year is late and will not occur until May 23rd. If you pair the Flower Moon with the averages that range from May 23rd to May 27th, depending on where you are, you will want to watch low temperatures and come up with a plan to combat the frost. Houseplants or potted material can easily be moved inside and out of the cold. In a nursery setting, or in your customers’ yards, here are some tips to mitigate some potential frost damage. At the nursery, we do two main things to battle against frost. Our first method is the continuous running of our irrigation. This frost protection program starts in the wee hours of the morning and runs every 45 minutes for 5-minute spurts throughout the entire nursery. This protects plants by using the heat of the water to continuously warm the plants. Our second mode of action is to use frost protection blankets. These blankets are typically lightweight but effective and do a nice job of keeping the frost from hitting the newly flushed leaves and buds. This method is less practical when talking about protecting an entire nursery, but a very effective plan for flower beds, or to cover smaller groups of our flushed perennials, and Roses. Tucking our plants in before a cold night gives us the peace of mind that they are safe and sound. Some other methods used across the industry are frost fans, under tree sprinklers, keeping grass short to absorb heat, frost protection sprays, and even the use of helicopters to increase air movement.
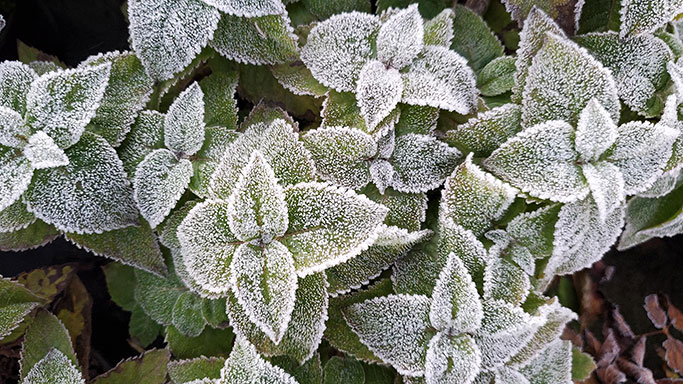
No matter how you slice it, frost is the arch nemesis of the nursery and homeowners alike. During early spring, it is imperative that we be on watch for cold temps and potential freezes. Whether you can run continuous irrigation, or just plan on using a frost blanket, having a game plan to protect your plants is imperative. Until Memorial Day, we will be keeping our eye on the sky to ensure the best plant material possible!

A special thank you to Michigan State University’s Rebecca Finneran and Keith Mason for help with frost-free dates. MSU is an excellent source for questions on lawns, landscape, gardening and horticulture in general.  You can contact them 24/7 by clicking here. Also, check out MSU’s Enviroweather Tool by clicking here. 

Molly De La Rosa Author

Rhododendrons 101

Rhododendron Cunningham White
/ˌrōdəˈdendrən/
     noun

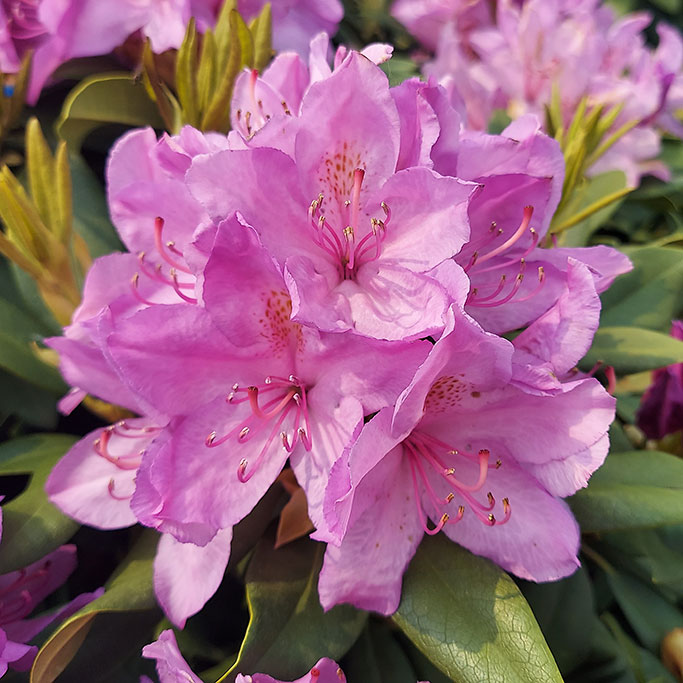
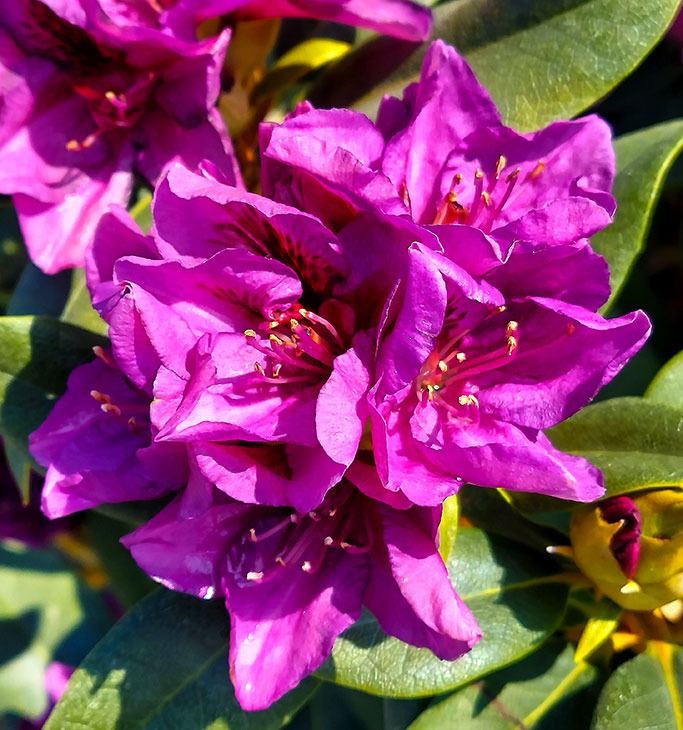
First of all, “Rhodys”, Azaleas, and ‘PJMs’ are all the same!!! They are all officially part of the rhododendron genus. They are one of our most popular stars of spring. All of those stocked at Christensen’s are Broadleaf Evergreens, flower in the spring, stay leafed out all year, and start the process over again. (We do not stock deciduous Azaleas anymore but if you need them, we will get you some.)

'Boursault' Rhododendron

Those most commonly recognized as “Large Leaf” Rhododendron can be monsters in their natural habitat, the Mid Atlantic. They do not actually have a final height or width as they will continue to grow and grow. I have seen massive ones traveling through Pennsylvania (it’s kinda hard to tell the exact size at 80MPH!). The cultivars that we sell here are some of the hardiest. We stick to H1 hybrids (H1=hardy to -25°F, occasionally a few H2’s arrive and they are hardy to -15°F, after that, we shy away!). ‘Edith Bosely’ is one of my favorites with a deep purple flower. 

I also like ‘Boursault’, again another purple flower (heading towards pink). ‘Boursault’ is a Rhododendron catawbiense hybrid and is short. It will reach 5-6’ max. Both are those hardier H1 hybrids.

  'Karen'                                  'Rosebud Double Light Pink'                            'Hino Crimson 

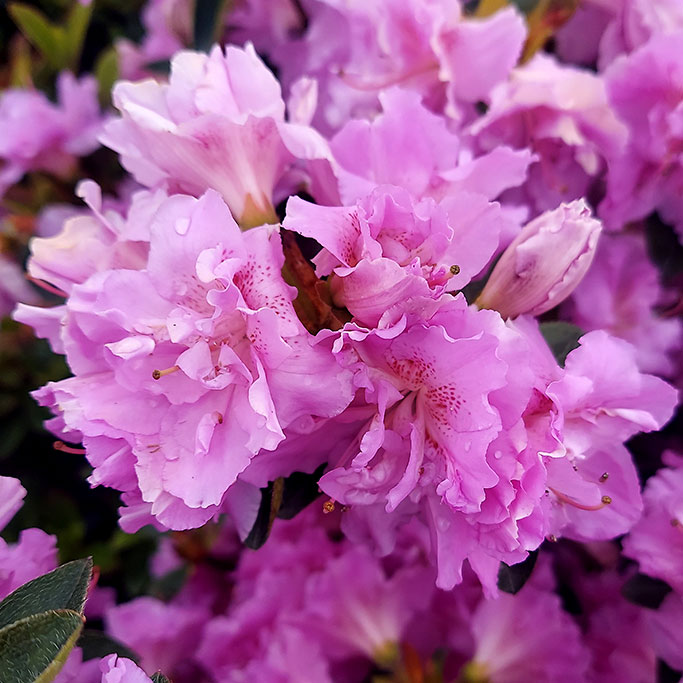
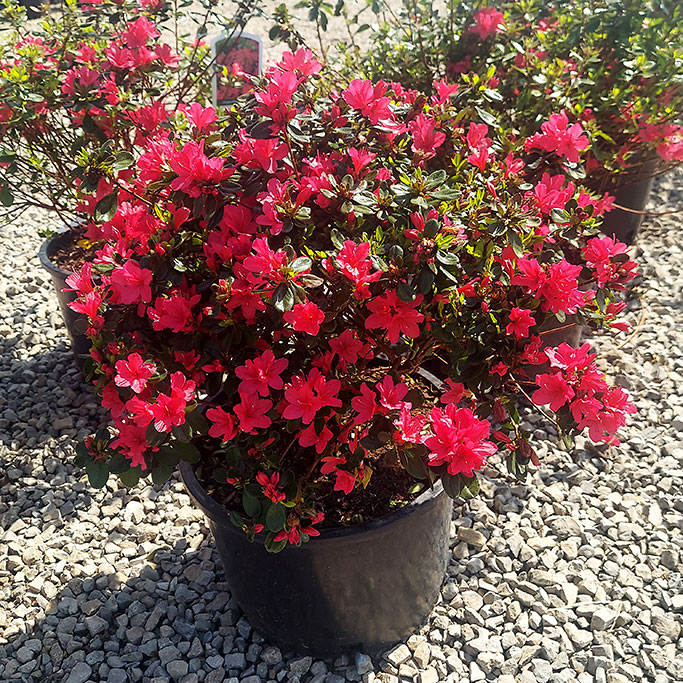
All Azaleas are Rhododendron… But not all Rhododendron are Azaleas. And, what would spring be without them? My favorite here is not your favorite (I can tell!!). ‘Elsie Lee’ is mine with huge purple trusses. The plant will reach 4-5’. Your favorites, based on sales, are ‘Karen” (Lavender, 3-4’), ‘Rosebud’ (small plant 2-4’ with pink flowers), and ‘Hino Crimson’ (2-4’ with deep red flowers). Oh yeah, you guys like ‘Stewartstonians’ also (4-5’ with deep red flowers).

(Sometimes I do question your tastes!!)

'Elsie Lee' Azalea

'PJM Elite' Rhododendron

Last on my list of Rhododendrons is the small-leafed “PJM”. ( FYI: PJM is a series developed by Peter J. Mezitt and his son in the 1930s to be exceptionally winter hardy.) They are getting very hard to find. Sometimes we get ‘PJM’, ‘PJM Elite’, or ‘PJM Regal’. They are all very similar and can work interchangeably. All have the same ‘PJM’ flowers and will reach 3-5’.

'Hino Crimson' Azalea

All Rhododendrons are planted for those flowers. I hear complaints about “Rhodies” not doing well after the first year or not flowering well after the first year. I am here to tell you WHY!!! Those great big, huge, long blooming flowers drain the plant of any strength it had! Not only will keeping your “Rhodo’s” well-fed produce more flowers, but it will help the plant with overwintering. Giving it strength to maintain those flower buds all winter long until WOW! Speaking of which – Remember “Rhodo’s” produce the flower buds just after blooming this year. If you need to prune your “Rhodies”, do so just after they flower.

One last note about Rhododendrons. They like very acidic soils. Top dressing them with peat a couple times a year will not only help to acidify the soil but by acidifying the soil the plant is able to take up more nutrients, therefore more flowers!! WIN-WIN.

Gotta go and find more ‘PJM’s’ and probably ‘Stewartstonians”! 

'Edith Bosley'

Kim Roth Byline

Tuck In Your Perennials for a Long Winter’s Nap

In late fall, besides the trees changing colors, you will also notice a change in your perennials. In this article, I would like to discuss fall perennial practices. Topics will include fall cleanup, which perennials should be cut back vs. which should not, perennial varieties that provide habitat for local wildlife, and how we close up the perennial greenhouses in the nursery. These tips should help with the overwintering process.

Let’s start in the landscape. When the temperature drops, it is wise to consider a fall cleanup. Cutting back your perennials in the fall prevents winter damage and is helpful to reduce the chance of infection. Most perennials can be cut back for the winter months. I would recommend cutting things like Hosta, Daylily, Nepeta, Peony, Phlox, and Salvia 1-2 inches from the ground. You can use pruners to cut them back by hand, but if you do, be sure to dip them in alcohol to kill any disease that may be spread through using the same tools on multiple plants. Some landscapers even cut back their perennials with a weedwhacker! Just make sure you clean up the debris so they will not be subject to any disease.

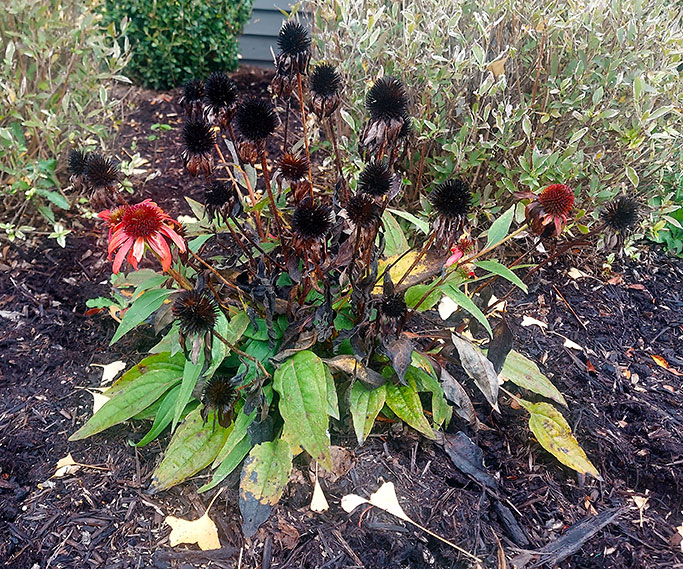
On the flip side, there are a few arguments for leaving some perennials in your garden alone. To protect the habitats of birds, and beneficial insects, you could consider not cutting Rudbeckia, Echinacea, Eupatorium or perennial sunflower. These seeds will provide food throughout the winter. If your home is close to wooded areas, meadows, or contains a brush pile, your garden may be even more habitat friendly. Some perennials that I would not cut back in the fall would be Asclepias, Ferns, Heuchera, and Dianthus. This is to protect the crowns during the harsh winter. Perennials are more cold-hardy when their stems are left intact. These stems can trap in snow, and work as an insulator for their crowns. A quick clean-up in the spring, and these will be just fine. The last reason why I would consider leaving some perennials be, would be their winter interest. Some stuff just looks awesome covered in snow! Species with stiff stems, or flat or cone-shaped dried flowers have a great winter look! Things like Sedum Autumn Joy, Ornamental grasses, or Echinacea Purpurea add to a garden’s winter beauty!

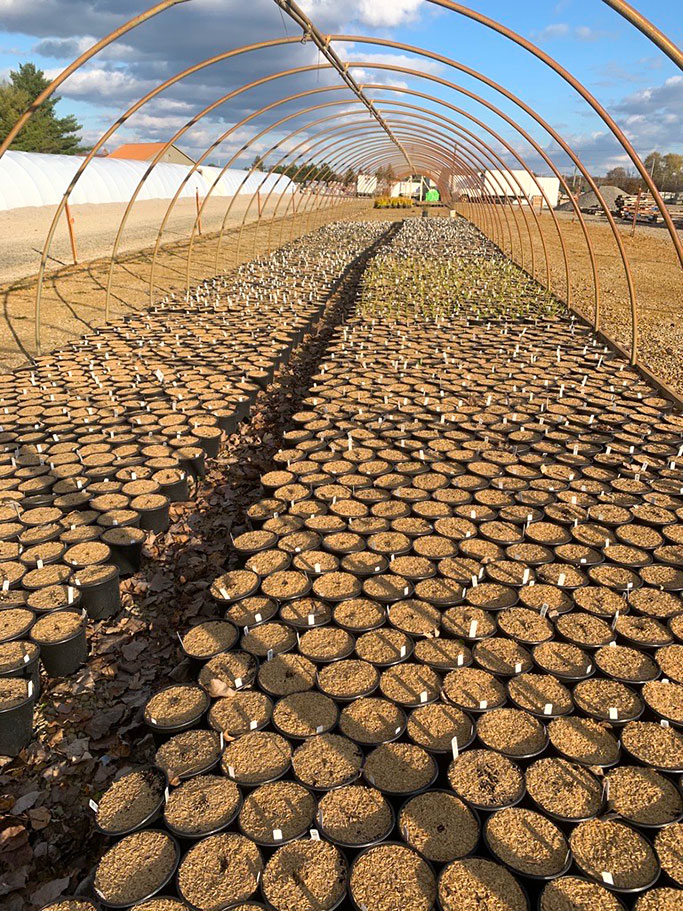
Here in the nursery, we do a few things to protect all our stock, including perennials from the harsh winter cold. Firstly, all of our material is placed in a hoop house (or a block that will ultimately become a hoop house). These “houses” are covered in opaque plastic. The covering of the perennials tends to happen a little quicker, as we have greenhouse structures- with doors, allowing us to still access the material. The benefit of covering early is the ability to control moisture. Too much, or too little moisture in the fall can contribute to the livelihood of potted material come spring. Another tip I have learned in my years in the nursery, is using items like Stella D’ Oro, or Hosta Patriot to act a barrier around more sensitive groups like Heuchera and Dianthus. 

It is also not uncommon to line an entire house with some of those winter tolerant varieties to both save space, and act as a buffer for other material. We also have one heated structure that we use to protect our grasses (mainly Miscanthus, and Pennisetum varieties), from ever freezing. By keeping minimum heat on our grasses, we are ensuring a healthy, happy grass come spring.

Whether you are overwintering perennials in your landscape, or at your nursery there are many factors to consider. Moisture, temperature, snowfall, and sometimes just plain old luck are all factors that will determine how your perennials fare over a long winter. Keeping in mind potential winter damage, bird and insect benefits, and most importantly, what’s best for the plant, will ensure a seamless transition to the brisk winter days! Happy spring clean ups!

Molly De La Rosa Author

Abracadabra! A Little Magic in Hardscape

Marketing is like magic. Magic is all about misdirection and sleight of hand. The performer will have you so focused on what the left hand is doing so that you never notice the right foot. Marketing can be very similar, focus on the positive and redirect from the negative. Everybody, I’m sure, remembers the expandable garden hose craze. For $25, they were great! Until you got 1 teeny tiny little hole, but nobody mentioned that the stretching feature comes at a cost of durability. Concrete wall and pavers are in the same boat, they have been advertised and promoted as low maintenance, especially compared to traditional wood decks. But what does that really mean, low maintenance? Let me redirect your focus over here then.

Ketchup on pavers

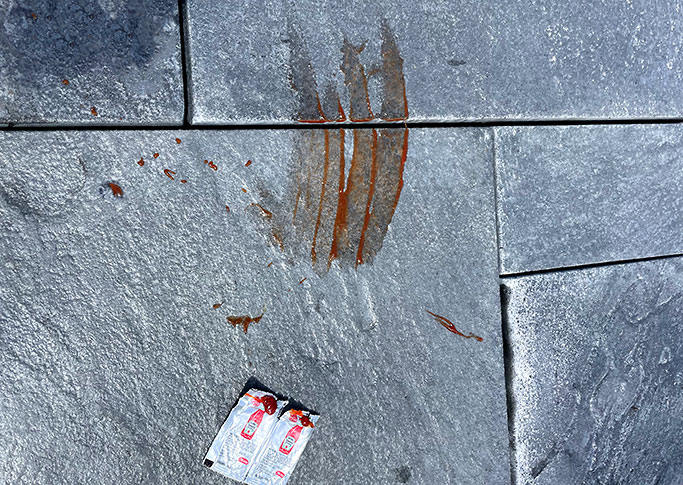
‘Low’ does not mean ‘none’. And, that does not always mean quick and easy, either. Concrete is a sponge; its pores will trap all sorts of dirt and debris. Rusty water, red soda stains, tree sap and salt residue are just a few examples of what your concrete products can soak up. This does not affect the strength or longevity of the brick but it sure can alter the color and appearance of it. To bring it back to almost a new appearance you will need to wash it!

Cleaners in Hardscape

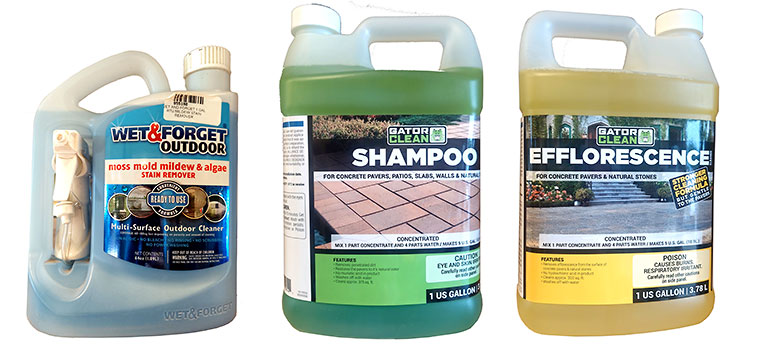
So how does one wash a brick? It does not involve any toothbrushes or mops, but it does involve some specialized cleaners depending on the stain or material you are trying to wash away. Not all, but most chemical cleaners have some small amount of acids in them, this is why you rarely need to scrub the concrete. The cleaner is designed to either soften or dissolve the materials, then simply rinse away with a garden hose. But with that dissolving effect comes a warning, left for too long or too strong of a mix could start to dissolve the concrete’s smaller particles which will leave the concrete pitted and appear much more aged. Always test on a small obscure place on the concrete to test the effects. There are cleaners that specialize in gum, oil, tar, rust, and organic material like food condiments and popsicle drippings.

Sealers in Hardscape

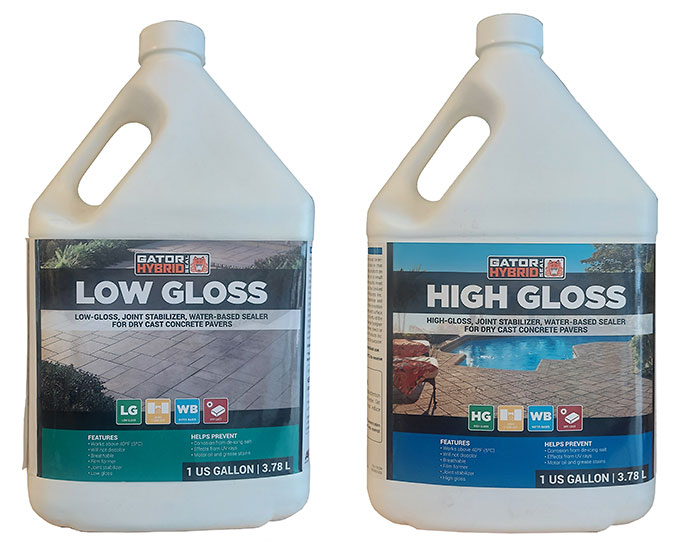
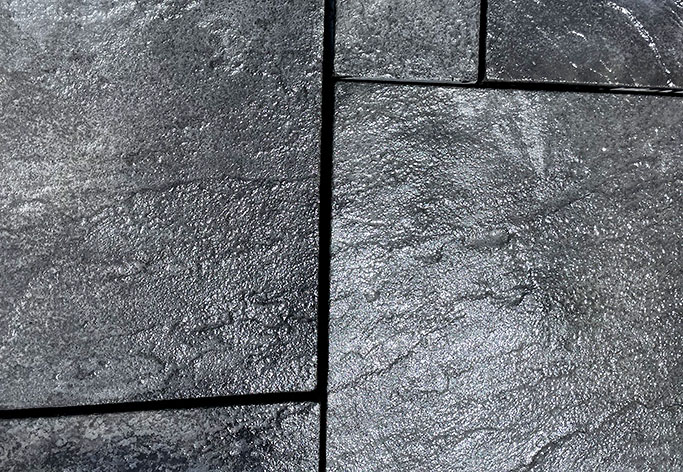
After the cleaning, you now have an opportunity to seal the concrete, if you so desire. Years and years ago you would have to wait 6 months to a year for the efflorescence to work its way out of the concrete. Back then the sealers were not breathable, they trapped everything in. Now they have water based breathable sealers that can be applied shortly after installation. But why would one want to seal the concrete, especially if you can simply clean it? Think of sealer like shoe shine, it helps protect the shoe’s material while it helps to improve the appearance. It will make cleaning stains much easier as well as help maintain or enhance the color of the concrete. This could be very important around cooking and dining areas. You don’t have to seal every year, maybe not even every other year, but you will have to reapply again at some point to maintain the same protection and appearance.

Cleaned Pavers

Sealing can be both a blessing and a curse. It is so nice to take the hose to a grape jelly blob and simply hose it away. But you may have one more thing to add to an ever-growing list of springtime chores. I choose to live dangerously; I go sealer free. But I also have an amazing washing system, a yard full of kids and a hose. The car, house, dog, tree, neighbor kids, and most times the patio get a good washing many times during the summer. But if you do not have a high fructose fueled (kids with popsicles) washing system like me, stop by the Hardscape Center and let us help you make your stains and grime disappear, magically!

Bryan Pajak

Let That Soak In

Bryan Pajak on his Boat in Early Spring

I love spring! The trees foliating and flowers blooming, the smell of fresh air in the house, planting the garden, and, of course, the boat rides. Last spring was nice, not hot too soon, no crazy two-foot snowstorms, but we did have a slight amount of extra rainfall. Slight being the understatement of the year, as we had over 2 months’ worth of rain in about a week! So, for a while last year I lived on 2 lakes, one my boat was on and the other in my back yard! Detroit and some neighboring cities were hit especially hard. A combination of old or faulty equipment, the inability of the infrastructure to process that amount of water, and I’m sure some design flaws and errors along the way.

Truck driving through flooded street

Water is the most destructive force on the planet, and it doesn’t take much of it to do a whole lot of damage. Climate changes have been producing some of the most intense and destructive weather that we have ever seen, and there is no sign of this pattern changing. What once worked before may be inadequate for today’s needs. As many municipalities change their designs on the processing and reclamation of storm and runoff water, should you also change your designs on the landscaping end?

Pothole on Ann Arbor Road in Plymouth Michigan

Unfortunately, we suffer every year from the effects of our freeze thaw cycle. The water underneath thaws and refreezes so many times that it creates voids by pushing everything around it away. When it thaws, those voids get refilled yet with more water and the process restarts. The problem is that the water has nowhere to go. You can’t stop the expansion, but you can give it a path to follow. One of the newer trends has been the use of clean fill aggregate as a base for driveways, patios, and even roads.

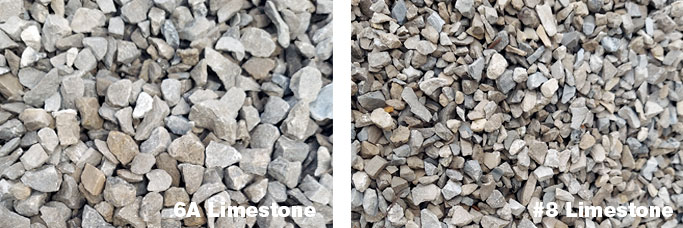
Clean Limestone in 6A and #8

The biggest differences between the clean aggregates and the traditional is the removal of the finer particulates and a more consistently sized stone. The lack of the finer particulates does not take away from the strength and stability of the base, but it allows for water expansion without exerting outward pressure in a confined area. This also allows for excellent drainage, so no more puddles or ponds. Many municipalities have incorporated this type of base because of how effective it is in reducing icing and refreezing since the water drains as soon as it has thawed. And the best part is you do not have to use a permeable style paver to obtain the benefits of a permeable base. The cost to change from traditional to permeable is negligible, the installation is slightly different but easy to follow.

High Format New Mission Driveway

As great as this sounds, there are of course a few draw backs. Firstly, is finding the material. Permeable pavers and permeable materials are slowly becoming more popular, but you may find certain areas more challenging than others to find the supplies you need. You will have to retrain your crew for a new installation process which is not hard, but change can always be a challenge. Lastly, this base requires maintenance. If you think of the base as a sponge, when the top is covered and clogged it no longer absorbs as well. Depending on the area, the amount of traffic, and surrounding landscape, this may need some frequent attention or very minimal maintenance. So, keep in mind that a permeable based driveway might not be the best choice if you live off a dirt road. But if your sunny backyard patio is always underwater after a good rain, that might be helpful choice.

At Christensen’s Plant and Hardscape Centers, we stock a huge assortment of drainage components from companies like NDS. We also stock the clean aggregates for the Hardscapers out there, too. Stop in and see what we can help solve for you. I promise you; it will not put a drain on us!

Bryan Pajak

Deicing Chemicals

Johan Jönsson (Julle), via Wikimedia Commons

This year has been one of the worst grade B late-night horror movies ever made! It is so bad that I would rather fast-forward and just watch the commercials. Thankfully, it’s almost over, but before we get to the credits I have a spoiler alert for what could be coming - a slip, slide or fall on the patio, steps, or driveway. Trust me when I say that the horror experience will only continue at the hospital. Here is some info so you can just fast-forward through those last few painful moments and hopefully save yourself from enduring a sequel in 2022.

USCapitol from Washington, D.C., United States of America, Public domain, via Wikimedia Commons

USCapitol from Washington, D.C., United States of America, Public domain, via Wikimedia Commons

What deicing chemicals do most concrete manufacturers suggest using?

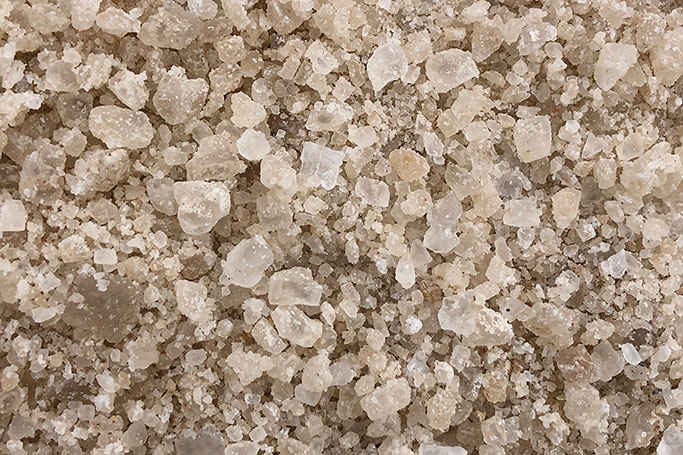
There is a lot of conflicting information about this out there, so let me distill it for you. All of this stuff can cause corrosion so choose your product based on the temperature range you are expecting and use whatever you use sparingly. Least damaging and preferred in most situations is good old rock salt, sodium chloride (NaCl) which is most effective to about 15°F. Colder than that, use calcium chloride (CaCl2) which works down to -2°. It is slightly more corrosive. Products containing magnesium should be avoided.

Are there any recommendations for using deicing products?

Follow the directions listed on the bag! In addition, practice these simple recommendations:

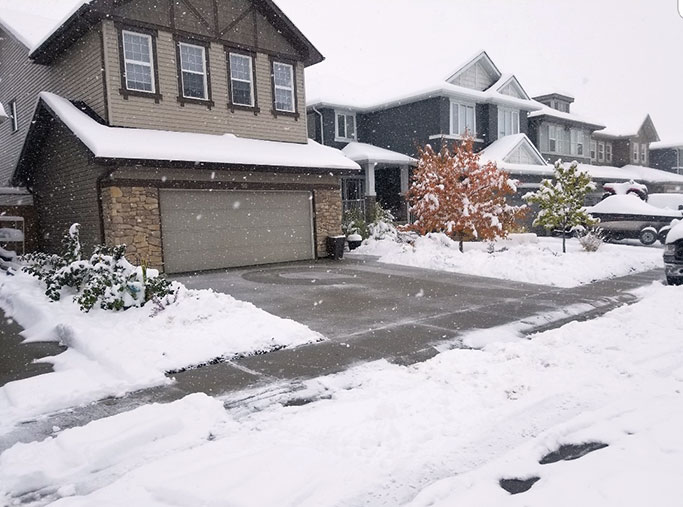
  • Clear the snow first before putting down product. There are no shortcuts here, sorry.
  • Use sparingly to prevent damage to your concrete surfaces and planted beds.
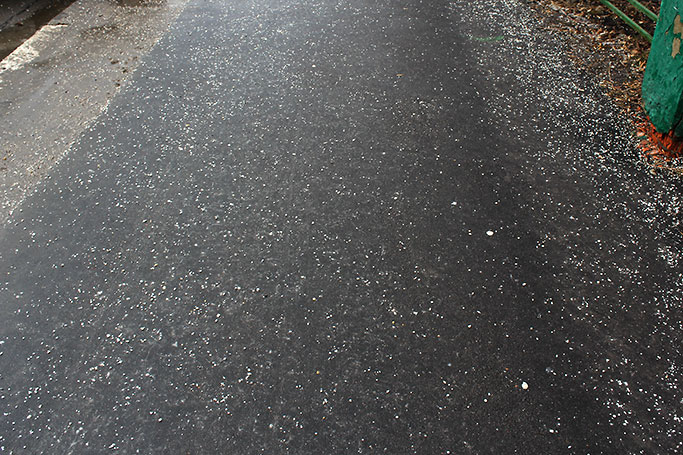
  • Sweep and remove any excess deicing product after the ice and snow melts.
  • After the winter season, thoroughly wash the paver surface to remove any chemicals remaining.
Famartin, via Wikimedia Commons

Famartin, via Wikimedia Commons

Can other types of deicing products be used?

It is not recommend to use any other types of deicing chemicals. This includes:

  • Magnesium chloride (MgCl2)
  • Calcium magnesium acetate (CMA)
  • Potassium chloride (KCl)
  • Potassium acetate (KA)
  • Fertilizers containing ammonium nitrate and ammonium sulfate.

The deicing product is not sodium chloride or calcium chloride, but the product label says it's safe for concrete. Can this product be used on concrete pavers?

It is not recommend using any products other than sodium chloride and calcium chloride. Research has found that some products are incorrectly listed as “safe” for concrete and do cause damage to concrete and concrete pavers.

Stolbovsky, via Wikimedia Commons

Stolbovsky, via Wikimedia Commons

Will sodium chloride and calcium chloride damage plant material?

Unfortunately, they can. Always use sparingly and try to prevent runoff of meltwater into landscape beds.

AGreenFutureCalgaryLandscaping, via Wikimedia Commons

AGreenFutureCalgaryLandscaping, via Wikimedia Commons

Other types of deicing chemicals have been used on ready mix concrete sidewalks without damaging the surface. Is this because concrete pavers are not as strong?

All concrete materials are susceptible to damage from deicing chemicals no matter how the concrete product is produced. It takes time for this type of damage to show. Concrete pavers are typically two to three times stronger in terms of pounds per square inch strength and have lower absorption rates than pour-in-place ready mix type concrete so are actually more resistant to damage. Proper application and cleanup of deicing products will go a long way in assuring the longevity of your concrete installations.

Call us at the Hardscape Center if you have any questions or concerns on what you should or shouldn’t use to help keep those patios, walkways and driveways looking great.

.

Weeds burning you up?

Flames

I have a problem. One the one hand, I have landscaping that I like to keep looking, well, ornamental. On the other hand, I prefer to avoid using herbicides and insecticides whenever possible. Now factor in the lack of gardening time that comes with working at a nursery and you can guess what my yard looks like by summer.

A lot of weeding can be avoided by keeping beds mulched, but what about driveways and paths? You can pull the weeds, if you can find the time to stay ahead of them. You can treat with herbicide, and depending on what product you choose, deal with too little - or too much - control. Or... you can do it the fun way - with a propane torch.

Editor's note: CPC is not endorsing this method. Use caution if you decide to try it.

Propane torch
Cooking the weeds

What I like about this method is the instant results and minimal regrowth that comes with superheating the ground, simultaneously cooking weed roots AND seeds lying in wait. The crackling flame as your enemy combusts is also quite satisfying. You'll want to do this on a windless day, to avoid getting into trouble with smoke or sparks.

It should be noted that this is a two-man job, one person running the torch and the other manning the hose. Thoroughly douse everything down after the torch passes so you don't accidentally burn down the neighborhood. I am not kidding about this.

  • Always stand with your back to desirable plantings. The HEAT is doing the killing and there can be a five-foot zone of death in front of your torch. (Don't ask me how I know this.) And look up - heat rises.
  • Use a board as a heat shield to protect the edges of beds or ornamental fencing. 
Heat barrier
  • Work slowly and methodically and watch the breeze. If it gets windy you must stop!
  • Water the ground the day before. You want green, short weeds, and seeds will cook better in moist ground. Do not use a torch on tall, dry weeds.
  • Hose down everything thoroughly as you go so nothing is left smoldering.
  • Be sure to have a spare, full tank in case you run out of propane before you finish your area.
  • Older, tougher weeds can re-sprout, go back in a week or two and re-treat.
  • Do not burn poison ivy - the smoke is toxic if inhaled.

The torch has an adjustment dial on the wand, you want to keep your flame just large enough to burn invisibly but not go out. As the pressure drops you can turn the dial to get more oomph. If your tank ices up stop and defrost it to get some pressure back.

Iced propane tank

This technique takes a little practice and is not for the faint of heart, but can't be beat for fast cleanups of driveways, paths, and paved areas. The torch shown is designed for clearing large areas, there are others on the market that have a smaller, more targeted flame.

Good for large areas
Holly Christensen

Designing? Keep these things in mind

Landscape

So, you’re ready to install some landscaping. What plants should you use, where, and how many? 

First thing to consider is the environment

Shady, sunny, windy, sandy, clay, deer ridden, salty… all of these conditions can exist on the same property. It is important to choose plants that prefer the environment you are dealing with.

Using boulders

Every environment has plants that love it

You will need to know how the sun is tracking and consider existing large trees or other plants to know which areas will be sunny, shady, or both. Some plants are excellent for adapting to several different conditions. For instance,  Diervilla (bush honeysuckle) grows in sun, shade, dry soil, alkaline soil, or acidic soil, and is deer resistant.

Diervilla

Draw your plan to scale using plant's mature sizes

Plan your landscape, on paper, to scale, and draw your plants at mature or near mature size. Scale is important for determining how much material you will need. Drawing plants at mature size will avoid overcrowding, and that in turn reduces maintenance as the plants have the room they need to grow and don’t have to be chopped into ugly unnatural shapes to control their size. This way, instead of becoming overgrown and ugly and needing redoing, your landscape will continue to improve with age.

Green meatballs
Overgrown

Use garden art or boulders to fill in gaps while plants grow

If this leaves some open spots while you’re waiting for the plants to grow, these are perfect spots for garden art, sculptures, containers, bird baths, fountains, and accent boulders. Accent boulders are usually a good idea intermingled with large perennial beds to maintain some visual interest in the winter.

Integrated accent

Use some evergreens for winter interest

And speaking of which, plant some evergreens so you have some winter color, and leave your ornamental grasses up until spring for some winter interest.

Grasses in the landscape

Use beds large enough to layer different sizes of plants

Another good reason to know how big your plants are going to get, aside from overcrowding, is so you can plant "stadium seating" style. Taller plants in the back, shorter in front.

Nice landscape

Follow these guidelines, and your customers will be recommending for years to come.

John Mollon

How to shear boxwood and yew

Sheared taxus

People are always asking me about the best time to prune the shrubs they've installed or are maintaining.  For flowering shrubs the answer is easy - prune right after they’re done blooming. Late pruning in this case is bad since you’re removing the next season's flower buds and most of your clients would not be happy about that.

Buxus ready for next shear

Boxwood (Buxus) and yew (Taxus) are a little different as flowers are not necessary or desired. First and foremost, always use very sharp pruners or shears, to make the pruning easier and reduce damage to the plant. To maintain trimmed forms and hedges you ideally need to shear twice a year. Once in late May or early June after the initial foliar flush, and then a second time around August. This causes the formation of lateral buds which help maintain denser growth. 

Sheared buxus

Keep in mind that shearing a plant to the same exact size every year causes the outside of the plant to become very dense, leaving the interior bare. Allowing for a slight increase helps delay the need for an extreme renewal pruning or plant replacement. Try not to prune during a drought period, and to prevent foliar freezeback pruning should never occur in late fall or winter. If you’re only going to shear once a year, try to do it around August. 

taxus with tight shear

When shearing hedges, taper them so that the top is narrower than the bottom, so all sides will be exposed to sunlight. This will give you a slightly pyramidal shape. Avoid at all cost the inverted pyramid look, as this even further screens sunlight and eventually kills the bottom.

Taxus hedge

Both boxwood and yew are very tolerant of shearing and with proper technique will remain attractive and functional in the landscape for many years. 

sheared taxus
Bill Ten Eyck

Stop me if you’ve heard this one

Polybind jointing sand

You might be surprised to hear that I have a night job as a stand-up comedian. I think I am really good at it since every time I’m up on stage, I always get a big reaction! Let me give you an example of one of my jokes: Two bags of polymeric sand walk onto a patio, and belly up to the installer. They each ask for a glass of water, but the installer looks at them and says “I can’t serve the two of you; you both look all washed out and in a haze!”

play

Okay, so if you are laughing at that, your sense of humor is in far worse shape than mine. If you're not laughing, then you know all too well that polymeric sand is really no joking topic.

Putting in jointing sand is typically the final stage of the project. We all know how easy it is to install - and sometimes to fail at. With all the new and improved polymeric sands flooding the market, how many have you tried? If you’ve answered none, then you are not alone. You have found the one product that works for you and have had success with. It’s hard to change the final step right before getting the final payment. However, many of these new products will outperform the “old” sands and save you time in the process. The key element is the watering procedure.

The most time-consuming step is that watering process. Many of the old products tell you to lightly mist a small area 2-3 times. That’s several opportunities for a mistake to happen. You have to also take into consideration the temperature, humidity, even if it is sunny or cloudy. Most of the new sands only require only a single watering application. Depending on the manufacturer, this could be due to polymer weight or reduction of dust particles. Now you have a few less chances to have an error. Make sure you apply enough water to fully saturate the joint, otherwise the joint will wash out at some point. I tell contractors to use the “shower” mode on the hose, and rinse off the bricks. The rest of the installation process is the same, but please read the instructions thoroughly. Even though the process may be similar, there could be slight differences between the manufacturers that could have consequences if not followed. Don’t be “that guy” that reads the directions after your IKEA cabinet is built upside down and inside out!

If you have a question about a process or a product, please call or stop in. If we don’t know the answers, we know the people that do. Let us help you solve whatever problems come your way over a cup of coffee, and maybe some really bad humor... I guess I won't be quitting my day job any time soon.

Bryan Pajak