Technical Reference – Sticks & Stones

Archive

Category Archives for "Technical Reference"

Stop The Spread – Just Squish It

Spotted Lanternfly Adult

As I sit here in the lull of August thinking about what to write my article on, nothing comes to mind. Usually, ideas will come to mind pretty quickly, but with 2 weeks away from getting married and all the prep and planning, topic ideas are just not flowing at the moment!

However, we had a meeting to inform our staff about an invasive pest that is making its way to Michigan, The Spotted Lanternfly (Lycorma delicatula). I’ve done an article about Cicadas in the past, so I thought this would be a good opportunity to share a little about what we learned in an effort to help inform you.
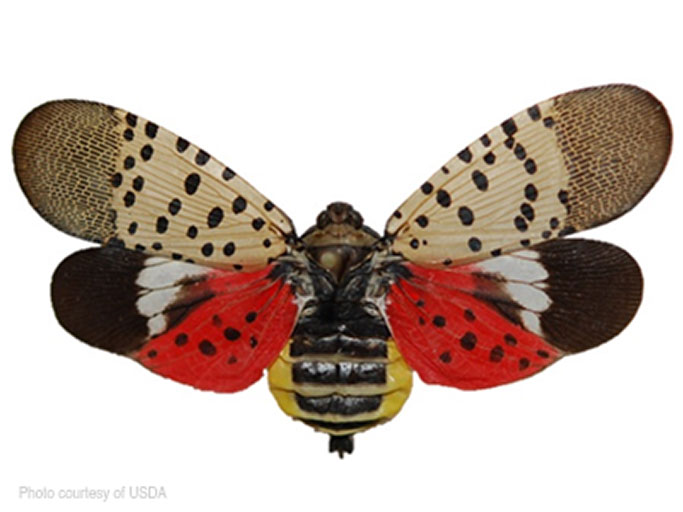
Spotted Lanternfly Adult

Spotted Lanternflies are native to China, Vietnam, and India. It was first reported in the states in 2014; believed to have come in on a shipment of landscape rocks found in Pennsylvania. Since then, they have been more detected in the eastern states such as Maryland, Delaware, Virginia, and New Jersey, slowly moving closer to Michigan over the past few years. Just this month, a small batch was found in Pontiac, MI, and were likely brought in on a shipment of plant material or even on the truck itself. Think of all the stinkbugs you see in the spring. Those also came from China to Pennsylvania and have now spread across the U.S in a matter of 25 years. Sound Familiar?

Spotted Lanternfly Wings Down Adult

The problem with these pests is that they can wreak havoc on farms, forests, grape vineyards, and orchards. They do not necessarily kill the plant but instead contribute to the plant’s mortality. They first weaken the plant by sucking sap from the hardwood areas and restricting photosynthesis. Doing so results in well… A LOT of pooping called ‘Honeydew’. This attracts insects, disease, and sooty mold, aiding in the possible fatality of the crop. Host plants for Spotted Lanternflies to feed on include but are not limited to species such as maples, walnut, willows, apple, and grape. Their primary choice is a tree native to China called Tree of Heaven (Ailanthus Altissima) which looks like a large Sumac that can reach 60’ in height. It is a very invasive tree that forms thickets all over the U.S. and Canada.
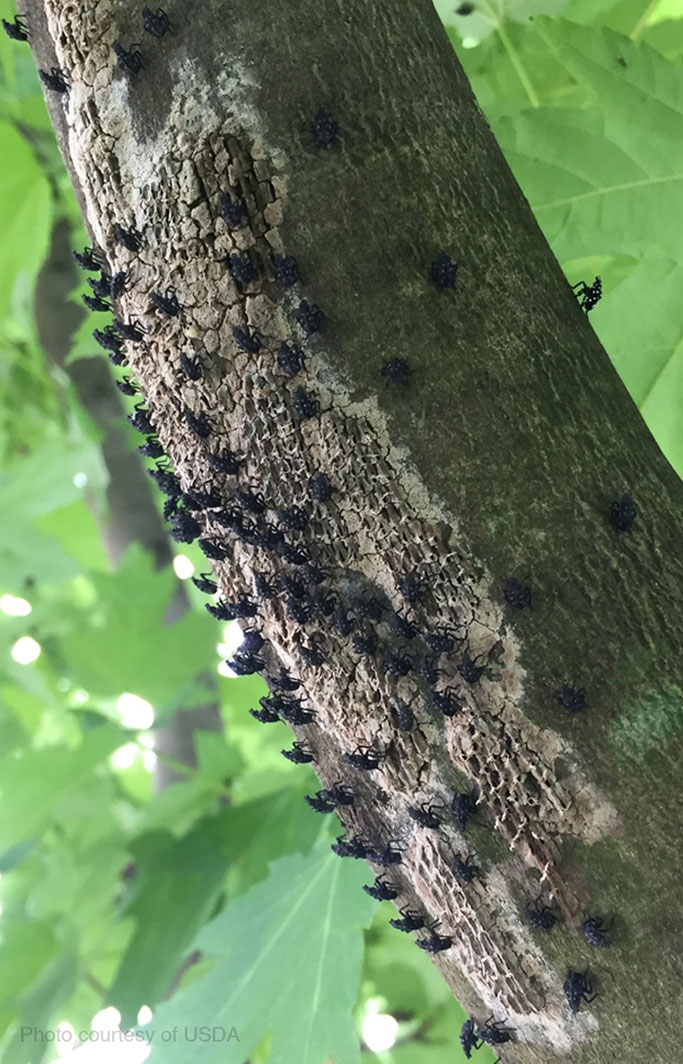
Spotted Lanternfly Nymphs

Spotted lanternflies lay their eggs in the fall and hatch in the spring. The egg mass almost looks like sand or mud smeared on the object that it is attached to. They will lay eggs on nearly any smooth surface, not just plants but your house, shed, benches, rocks, tires, etc. There could be up to 50 eggs in each little egg mass. After the eggs hatch around June, the beginning of their nymphal cycle begins. From the end of April to early July, their looks could be confused to the untrained eye of a tick. They are about an 1/8” long with little white spots. They reach their final Nymphal stage from July to early August and change to a red color with white spots and traces of black. They are about a half inch in length in this stage and easy to spot due to that vibrant red color. 

After this, they reach their adult phase and will grow wings and reach up to an inch in length. The body becomes black in color. The red that made them highly visible before is now only on their hind wings which are now covered by their forewings that are grey with black spots. They complete their cycle by laying eggs in September-November and eventually dying come first frost.

Spotted Lanternfly Adults

Where they are native, they have a ton of predators to help with infestation. Unfortunately, they do not have many predators here. The main ones being Praying Mantis, and Spiders. Experts believe, we cannot stop the spread, but we can slow the spread. If you see one, have no mercy and smash them and report the areas in which it was found to your state department of Agriculture. In this way, we can all help protect each other’s crops.

For more information, visit the USDA website

Luke Joerin

Let That Soak In

Bryan Pajak on his Boat in Early Spring

I love spring! The trees foliating and flowers blooming, the smell of fresh air in the house, planting the garden, and, of course, the boat rides. Last spring was nice, not hot too soon, no crazy two-foot snowstorms, but we did have a slight amount of extra rainfall. Slight being the understatement of the year, as we had over 2 months’ worth of rain in about a week! So, for a while last year I lived on 2 lakes, one my boat was on and the other in my back yard! Detroit and some neighboring cities were hit especially hard. A combination of old or faulty equipment, the inability of the infrastructure to process that amount of water, and I’m sure some design flaws and errors along the way.

Truck driving through flooded street

Water is the most destructive force on the planet, and it doesn’t take much of it to do a whole lot of damage. Climate changes have been producing some of the most intense and destructive weather that we have ever seen, and there is no sign of this pattern changing. What once worked before may be inadequate for today’s needs. As many municipalities change their designs on the processing and reclamation of storm and runoff water, should you also change your designs on the landscaping end?

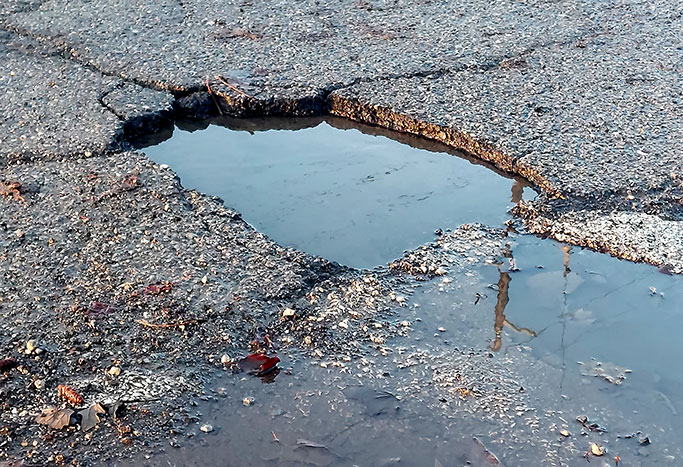
Pothole on Ann Arbor Road in Plymouth Michigan

Unfortunately, we suffer every year from the effects of our freeze thaw cycle. The water underneath thaws and refreezes so many times that it creates voids by pushing everything around it away. When it thaws, those voids get refilled yet with more water and the process restarts. The problem is that the water has nowhere to go. You can’t stop the expansion, but you can give it a path to follow. One of the newer trends has been the use of clean fill aggregate as a base for driveways, patios, and even roads.

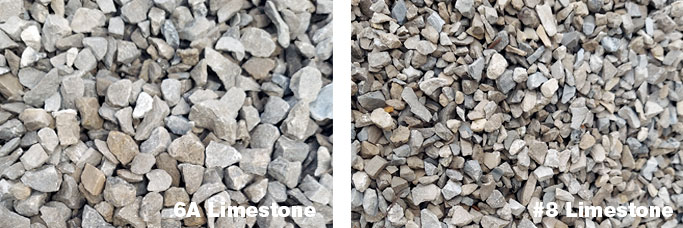
Clean Limestone in 6A and #8

The biggest differences between the clean aggregates and the traditional is the removal of the finer particulates and a more consistently sized stone. The lack of the finer particulates does not take away from the strength and stability of the base, but it allows for water expansion without exerting outward pressure in a confined area. This also allows for excellent drainage, so no more puddles or ponds. Many municipalities have incorporated this type of base because of how effective it is in reducing icing and refreezing since the water drains as soon as it has thawed. And the best part is you do not have to use a permeable style paver to obtain the benefits of a permeable base. The cost to change from traditional to permeable is negligible, the installation is slightly different but easy to follow.

High Format New Mission Driveway

As great as this sounds, there are of course a few draw backs. Firstly, is finding the material. Permeable pavers and permeable materials are slowly becoming more popular, but you may find certain areas more challenging than others to find the supplies you need. You will have to retrain your crew for a new installation process which is not hard, but change can always be a challenge. Lastly, this base requires maintenance. If you think of the base as a sponge, when the top is covered and clogged it no longer absorbs as well. Depending on the area, the amount of traffic, and surrounding landscape, this may need some frequent attention or very minimal maintenance. So, keep in mind that a permeable based driveway might not be the best choice if you live off a dirt road. But if your sunny backyard patio is always underwater after a good rain, that might be helpful choice.

At Christensen’s Plant and Hardscape Centers, we stock a huge assortment of drainage components from companies like NDS. We also stock the clean aggregates for the Hardscapers out there, too. Stop in and see what we can help solve for you. I promise you; it will not put a drain on us!

Bryan Pajak

Deicing Chemicals

Johan Jönsson (Julle), via Wikimedia Commons

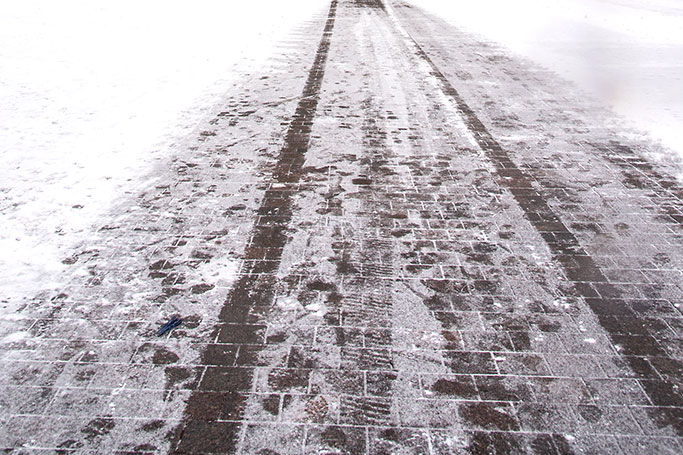
This year has been one of the worst grade B late-night horror movies ever made! It is so bad that I would rather fast-forward and just watch the commercials. Thankfully, it’s almost over, but before we get to the credits I have a spoiler alert for what could be coming - a slip, slide or fall on the patio, steps, or driveway. Trust me when I say that the horror experience will only continue at the hospital. Here is some info so you can just fast-forward through those last few painful moments and hopefully save yourself from enduring a sequel in 2022.

USCapitol from Washington, D.C., United States of America, Public domain, via Wikimedia Commons

USCapitol from Washington, D.C., United States of America, Public domain, via Wikimedia Commons

What deicing chemicals do most concrete manufacturers suggest using?

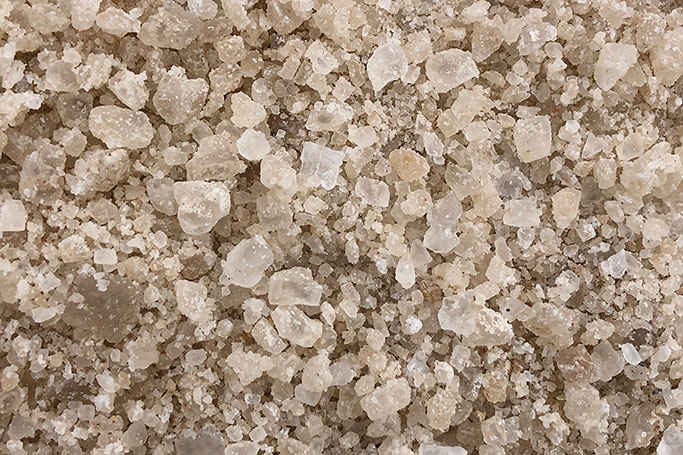
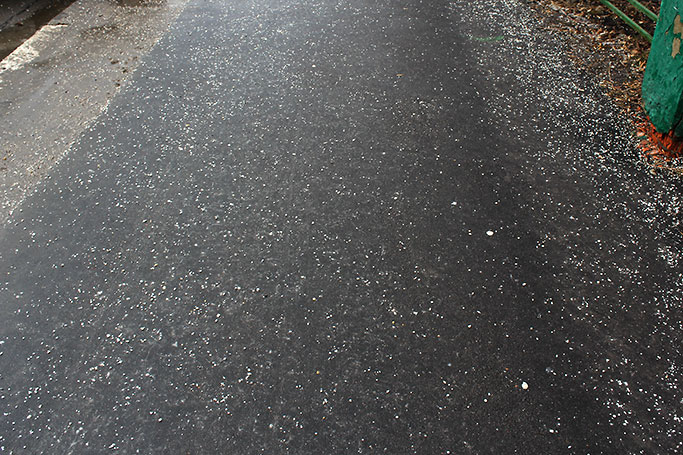
There is a lot of conflicting information about this out there, so let me distill it for you. All of this stuff can cause corrosion so choose your product based on the temperature range you are expecting and use whatever you use sparingly. Least damaging and preferred in most situations is good old rock salt, sodium chloride (NaCl) which is most effective to about 15°F. Colder than that, use calcium chloride (CaCl2) which works down to -2°. It is slightly more corrosive. Products containing magnesium should be avoided.

Are there any recommendations for using deicing products?

Follow the directions listed on the bag! In addition, practice these simple recommendations:

  • Clear the snow first before putting down product. There are no shortcuts here, sorry.
  • Use sparingly to prevent damage to your concrete surfaces and planted beds.
  • Sweep and remove any excess deicing product after the ice and snow melts.
  • After the winter season, thoroughly wash the paver surface to remove any chemicals remaining.
Famartin, via Wikimedia Commons

Famartin, via Wikimedia Commons

Can other types of deicing products be used?

It is not recommend to use any other types of deicing chemicals. This includes:

  • Magnesium chloride (MgCl2)
  • Calcium magnesium acetate (CMA)
  • Potassium chloride (KCl)
  • Potassium acetate (KA)
  • Fertilizers containing ammonium nitrate and ammonium sulfate.

The deicing product is not sodium chloride or calcium chloride, but the product label says it's safe for concrete. Can this product be used on concrete pavers?

It is not recommend using any products other than sodium chloride and calcium chloride. Research has found that some products are incorrectly listed as “safe” for concrete and do cause damage to concrete and concrete pavers.

Stolbovsky, via Wikimedia Commons

Stolbovsky, via Wikimedia Commons

Will sodium chloride and calcium chloride damage plant material?

Unfortunately, they can. Always use sparingly and try to prevent runoff of meltwater into landscape beds.

AGreenFutureCalgaryLandscaping, via Wikimedia Commons

AGreenFutureCalgaryLandscaping, via Wikimedia Commons

Other types of deicing chemicals have been used on ready mix concrete sidewalks without damaging the surface. Is this because concrete pavers are not as strong?

All concrete materials are susceptible to damage from deicing chemicals no matter how the concrete product is produced. It takes time for this type of damage to show. Concrete pavers are typically two to three times stronger in terms of pounds per square inch strength and have lower absorption rates than pour-in-place ready mix type concrete so are actually more resistant to damage. Proper application and cleanup of deicing products will go a long way in assuring the longevity of your concrete installations.

Call us at the Hardscape Center if you have any questions or concerns on what you should or shouldn’t use to help keep those patios, walkways and driveways looking great.

.

A sticky question

Evan-Amos, Public domain, via Wikimedia Commons

Adhesives hold our world together - literally. Industrial products of all kinds require bonds of varying strength to perform their function, from the furniture in your living room to the parts that intricately connect and hold together the automobile in your driveway. Due to my numerous hobbies I have easily fifteen different varieties in my basement right now. Luckily in our industry, we do not need quite that many. So let's talk about the main two types of adhesive products that you can choose from to make walls and steps; solvent based or polyurethane based.

Lippincott's Monthly Magazine, Public domain, via Wikimedia Commons

Lippincott's Monthly Magazine, Public domain, via Wikimedia Commons

SRW Adhesive

The first is solvent-based adhesive like our VOC compliant SRW. This style has been the longest in the market and is still highly used. It cures as the solvent evaporates, leaving the polymers. (Cons are toxic and flammable fumes in non-VOC compliant products.) The pros for this product are price and availability, an extremely long shelf life, and basic ease of use. There are a wide range of curing times which are affected by heat, humidity, and moisture. The product will also shrink due to the amount of evaporation during the curing process, which mostly isn't a factor in our industry.

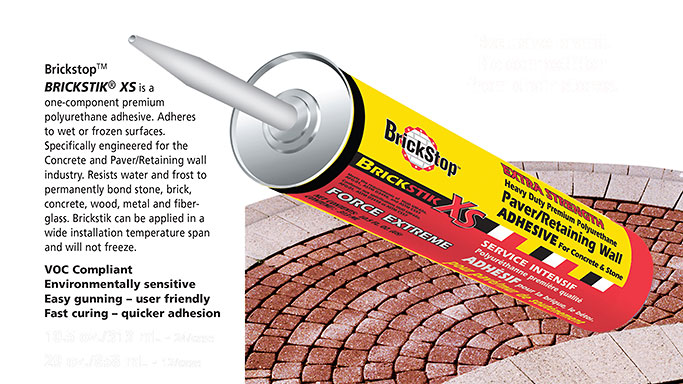
Brickstick Adhesive

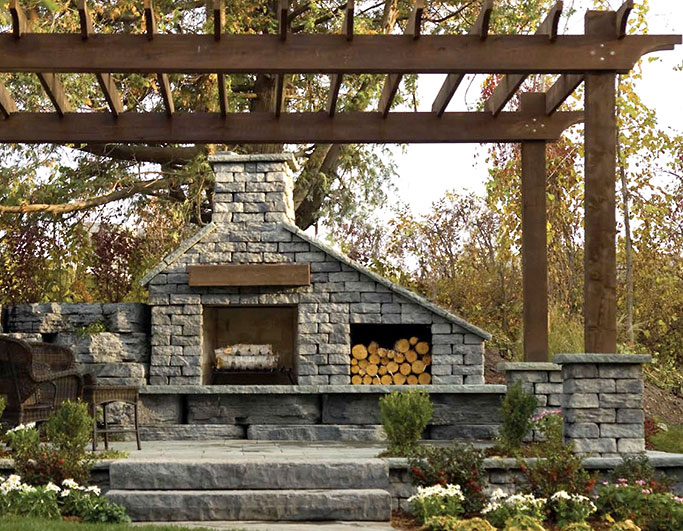
The next type of adhesive is polyurethane-based, such as Brickstick. The curing process for this product uses air and moisture. Since there are no solvents, there is no shrinking or cracking while this product cures. It can also withstand higher temperatures like you would see in a fire pit or fireplace. Lastly, the speed at which this product cures is probably the most significant reason this type of adhesive is sought after. However, that speed can also be problematic if you need to move, shift, or rearrange something so plan accordingly. It is also harder to remove from hands or tools. The shelf life is under a year so pay attention to that when stocking up.

outdoor fireplace

Both types of adhesives will perform well for most of your applications. They are both usable in rain or snow, so mother nature won't get in the way. Both are low-VOC compliant (volatile organic compound) so enclosed areas are no problem. Here at Christensen's we stock both types of adhesive, to have you covered in whichever choice you make. Ask one of our salesmen about the whats and whys so we can better help adhere to your needs and stick you with a great product.

Bryan Pajak

Poly sand fundamentals

Retro TV set

As a movie and TV enthusiast I often re-watch older episodes before enjoying the new season of a show or the next movie in a series. You know how you always see a few things that you didn’t remember from that first viewing? The same can be said about a company’s policies, practices, or procedures. Forgetting how to start a machine is just embarrassing but forgetting how to install or maintain something can be very costly. So, let’s go back a few episodes and review, to see if there is something that you may have missed or forgotten.

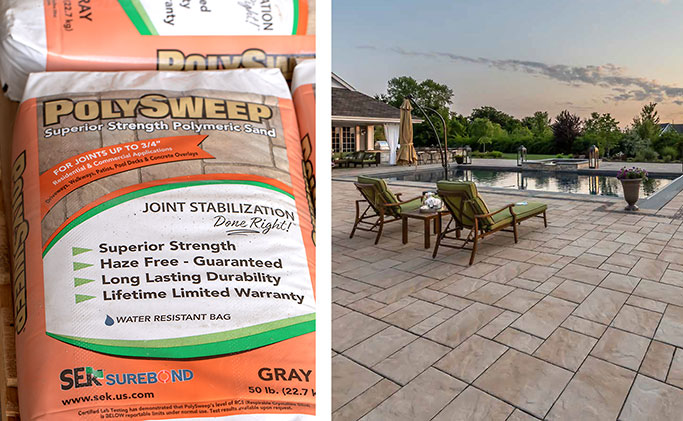
Polysweep sand

My favorite rerun episodes are about polymeric sweeping sands. There are many new and improved types of polymeric sand on the market, and I would count on there being more in the future. Some of the new features include being rain safe in so many minutes, dust free, haze free or allowing installation while the product is wet. All these features are great, but there are still some fundamentals that you need to remember. Here are some of the highlights:

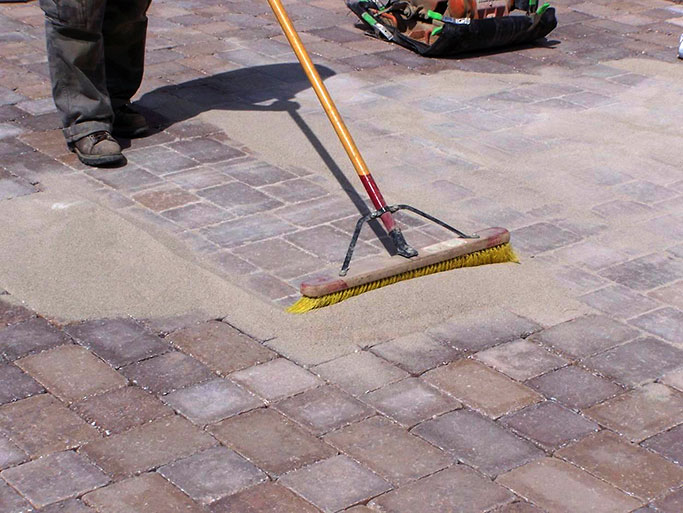
Sweeping in polysand
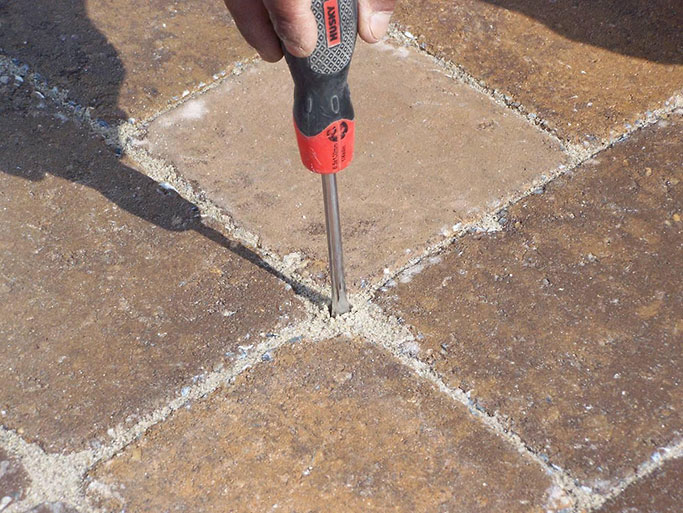
  • When you are applying and sweeping the sand into the joint, be careful not to overfill. In most cases you want to have the sand be 1/8th of an inch from the top of the paver. Exceptions are cobbled types of pavers where you may want even less sand in the joint to bring out the cobbled appearance. You can always sweep out the excess when it’s still dry, that's a lot harder after it has been wetted or has set.
Check depth of poly sand
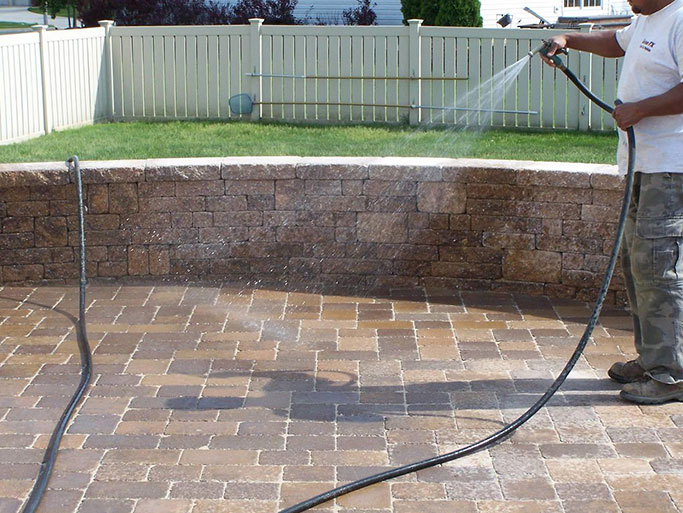
  • Work in sections when applying the water. Even though many products have a single watering procedure, do not get carried away and water huge portions at a time. The watering process is the most essential step and adding too much or too little water because you lost track of where you did or did not cover could end in disaster.
Watering poly sand
  • Speaking of watering, read the instructions fully and carefully. Did the brand you’re using change formulas or best installation practices? Have they added a feature that you were unaware of, or taken one out? Is this the right product for your application? You will not know if you do not read. If you have questions, always feel free to call the Hardscape Center for advice and guidance.
Entryway with pavers
  • Understand how your product will work on your site. Consider things like humidity, dew points and temperature. Is the project in the sun or the shade, is there irrigation near that may hinder the curing time? To fully cure, the product must completely dry after installation. If it does not dry, it will not cure. Uncured sand can wash out, swell up from excess water or have the polymers seep out and stain the pavers.
Driveway of pavers

There are many more things to consider when applying polymeric jointing sand, but the above are the most common issues that I hear about. All the above can be prevented or addressed, and all are costly if forgotten about. Typically, the sand is the last part of the project and could be the hardest thing to fix. It never hurts to get a refresher on the installation of this essential step. If you have any questions or concerns do not hesitate to call. The next season is upon us, so grab some popcorn and take the time to review before you get lost by episode #2. Stay tuned for previews for the next show with limited commercial breaks!

Bryan Pajak

How to install landscape lighting

Alliance bullet fixture

Outdoor accent lighting is one of the simplest ways to boost a landscape project from good to GREAT. Whether you are working with an all-new design or enhancing an established landscape, adding low-voltage lighting has a lot going for it.

We carry quality fixtures in a range of finishes to complement any style. Don't overlook using lighting in hardscape projects, too. How about path lighting integrated right into a paver walk? From deck lights to well lights, path lights to wall washes - there is a lighting solution for pretty much any situation. 

outdoor accent lighting

I've made a short video to show you just how easy it is to work with today's modern lighting products. Take a few minutes to watch - I think you'll be inspired to give outdoor lighting a place in your future designs.

David Reutter