How-tos – Page 2 – Sticks & Stones

Archive

Category Archives for "How-tos"

Deicing Chemicals

Johan Jönsson (Julle), via Wikimedia Commons

This year has been one of the worst grade B late-night horror movies ever made! It is so bad that I would rather fast-forward and just watch the commercials. Thankfully, it’s almost over, but before we get to the credits I have a spoiler alert for what could be coming - a slip, slide or fall on the patio, steps, or driveway. Trust me when I say that the horror experience will only continue at the hospital. Here is some info so you can just fast-forward through those last few painful moments and hopefully save yourself from enduring a sequel in 2022.

USCapitol from Washington, D.C., United States of America, Public domain, via Wikimedia Commons

USCapitol from Washington, D.C., United States of America, Public domain, via Wikimedia Commons

What deicing chemicals do most concrete manufacturers suggest using?

There is a lot of conflicting information about this out there, so let me distill it for you. All of this stuff can cause corrosion so choose your product based on the temperature range you are expecting and use whatever you use sparingly. Least damaging and preferred in most situations is good old rock salt, sodium chloride (NaCl) which is most effective to about 15°F. Colder than that, use calcium chloride (CaCl2) which works down to -2°. It is slightly more corrosive. Products containing magnesium should be avoided.

Are there any recommendations for using deicing products?

Follow the directions listed on the bag! In addition, practice these simple recommendations:

  • Clear the snow first before putting down product. There are no shortcuts here, sorry.
  • Use sparingly to prevent damage to your concrete surfaces and planted beds.
  • Sweep and remove any excess deicing product after the ice and snow melts.
  • After the winter season, thoroughly wash the paver surface to remove any chemicals remaining.
Famartin, via Wikimedia Commons

Famartin, via Wikimedia Commons

Can other types of deicing products be used?

It is not recommend to use any other types of deicing chemicals. This includes:

  • Magnesium chloride (MgCl2)
  • Calcium magnesium acetate (CMA)
  • Potassium chloride (KCl)
  • Potassium acetate (KA)
  • Fertilizers containing ammonium nitrate and ammonium sulfate.

The deicing product is not sodium chloride or calcium chloride, but the product label says it's safe for concrete. Can this product be used on concrete pavers?

It is not recommend using any products other than sodium chloride and calcium chloride. Research has found that some products are incorrectly listed as “safe” for concrete and do cause damage to concrete and concrete pavers.
Stolbovsky, via Wikimedia Commons

Stolbovsky, via Wikimedia Commons

Will sodium chloride and calcium chloride damage plant material?

Unfortunately, they can. Always use sparingly and try to prevent runoff of meltwater into landscape beds.
AGreenFutureCalgaryLandscaping, via Wikimedia Commons

AGreenFutureCalgaryLandscaping, via Wikimedia Commons

Other types of deicing chemicals have been used on ready mix concrete sidewalks without damaging the surface. Is this because concrete pavers are not as strong?

All concrete materials are susceptible to damage from deicing chemicals no matter how the concrete product is produced. It takes time for this type of damage to show. Concrete pavers are typically two to three times stronger in terms of pounds per square inch strength and have lower absorption rates than pour-in-place ready mix type concrete so are actually more resistant to damage. Proper application and cleanup of deicing products will go a long way in assuring the longevity of your concrete installations.

Call us at the Hardscape Center if you have any questions or concerns on what you should or shouldn’t use to help keep those patios, walkways and driveways looking great.

.

Weeds burning you up?

Flames

I have a problem. One the one hand, I have landscaping that I like to keep looking, well, ornamental. On the other hand, I prefer to avoid using herbicides and insecticides whenever possible. Now factor in the lack of gardening time that comes with working at a nursery and you can guess what my yard looks like by summer.

A lot of weeding can be avoided by keeping beds mulched, but what about driveways and paths? You can pull the weeds, if you can find the time to stay ahead of them. You can treat with herbicide, and depending on what product you choose, deal with too little - or too much - control. Or... you can do it the fun way - with a propane torch.

Editor's note: CPC is not endorsing this method. Use caution if you decide to try it.

Propane torch
Cooking the weeds

What I like about this method is the instant results and minimal regrowth that comes with superheating the ground, simultaneously cooking weed roots AND seeds lying in wait. The crackling flame as your enemy combusts is also quite satisfying. You'll want to do this on a windless day, to avoid getting into trouble with smoke or sparks.

It should be noted that this is a two-man job, one person running the torch and the other manning the hose. Thoroughly douse everything down after the torch passes so you don't accidentally burn down the neighborhood. I am not kidding about this.

  • Always stand with your back to desirable plantings. The HEAT is doing the killing and there can be a five-foot zone of death in front of your torch. (Don't ask me how I know this.) And look up - heat rises.
  • Use a board as a heat shield to protect the edges of beds or ornamental fencing. 
Heat barrier
  • Work slowly and methodically and watch the breeze. If it gets windy you must stop!
  • Water the ground the day before. You want green, short weeds, and seeds will cook better in moist ground. Do not use a torch on tall, dry weeds.
  • Hose down everything thoroughly as you go so nothing is left smoldering.
  • Be sure to have a spare, full tank in case you run out of propane before you finish your area.
  • Older, tougher weeds can re-sprout, go back in a week or two and re-treat.
  • Do not burn poison ivy - the smoke is toxic if inhaled.

The torch has an adjustment dial on the wand, you want to keep your flame just large enough to burn invisibly but not go out. As the pressure drops you can turn the dial to get more oomph. If your tank ices up stop and defrost it to get some pressure back.

Iced propane tank

This technique takes a little practice and is not for the faint of heart, but can't be beat for fast cleanups of driveways, paths, and paved areas. The torch shown is designed for clearing large areas, there are others on the market that have a smaller, more targeted flame.

Good for large areas
Holly Christensen

Designing? Keep these things in mind

Landscape

So, you’re ready to install some landscaping. What plants should you use, where, and how many? 

First thing to consider is the environment

Shady, sunny, windy, sandy, clay, deer ridden, salty… all of these conditions can exist on the same property. It is important to choose plants that prefer the environment you are dealing with.

Using boulders

Every environment has plants that love it

You will need to know how the sun is tracking and consider existing large trees or other plants to know which areas will be sunny, shady, or both. Some plants are excellent for adapting to several different conditions. For instance,  Diervilla (bush honeysuckle) grows in sun, shade, dry soil, alkaline soil, or acidic soil, and is deer resistant.

Diervilla

Draw your plan to scale using plant's mature sizes

Plan your landscape, on paper, to scale, and draw your plants at mature or near mature size. Scale is important for determining how much material you will need. Drawing plants at mature size will avoid overcrowding, and that in turn reduces maintenance as the plants have the room they need to grow and don’t have to be chopped into ugly unnatural shapes to control their size. This way, instead of becoming overgrown and ugly and needing redoing, your landscape will continue to improve with age.

Green meatballs
Overgrown

Use garden art or boulders to fill in gaps while plants grow

If this leaves some open spots while you’re waiting for the plants to grow, these are perfect spots for garden art, sculptures, containers, bird baths, fountains, and accent boulders. Accent boulders are usually a good idea intermingled with large perennial beds to maintain some visual interest in the winter.

Integrated accent

Use some evergreens for winter interest

And speaking of which, plant some evergreens so you have some winter color, and leave your ornamental grasses up until spring for some winter interest.

Grasses in the landscape

Use beds large enough to layer different sizes of plants

Another good reason to know how big your plants are going to get, aside from overcrowding, is so you can plant "stadium seating" style. Taller plants in the back, shorter in front.

Nice landscape

Follow these guidelines, and your customers will be recommending for years to come.

John Mollon

How to shear boxwood and yew

Sheared taxus

People are always asking me about the best time to prune the shrubs they've installed or are maintaining.  For flowering shrubs the answer is easy - prune right after they’re done blooming. Late pruning in this case is bad since you’re removing the next season's flower buds and most of your clients would not be happy about that.

Buxus ready for next shear

Boxwood (Buxus) and yew (Taxus) are a little different as flowers are not necessary or desired. First and foremost, always use very sharp pruners or shears, to make the pruning easier and reduce damage to the plant. To maintain trimmed forms and hedges you ideally need to shear twice a year. Once in late May or early June after the initial foliar flush, and then a second time around August. This causes the formation of lateral buds which help maintain denser growth. 

Sheared buxus

Keep in mind that shearing a plant to the same exact size every year causes the outside of the plant to become very dense, leaving the interior bare. Allowing for a slight increase helps delay the need for an extreme renewal pruning or plant replacement. Try not to prune during a drought period, and to prevent foliar freezeback pruning should never occur in late fall or winter. If you’re only going to shear once a year, try to do it around August. 

taxus with tight shear

When shearing hedges, taper them so that the top is narrower than the bottom, so all sides will be exposed to sunlight. This will give you a slightly pyramidal shape. Avoid at all cost the inverted pyramid look, as this even further screens sunlight and eventually kills the bottom.

Taxus hedge

Both boxwood and yew are very tolerant of shearing and with proper technique will remain attractive and functional in the landscape for many years. 

sheared taxus
Bill Ten Eyck

Stop me if you’ve heard this one

Polybind jointing sand

You might be surprised to hear that I have a night job as a stand-up comedian. I think I am really good at it since every time I’m up on stage, I always get a big reaction! Let me give you an example of one of my jokes: Two bags of polymeric sand walk onto a patio, and belly up to the installer. They each ask for a glass of water, but the installer looks at them and says “I can’t serve the two of you; you both look all washed out and in a haze!”

play

Okay, so if you are laughing at that, your sense of humor is in far worse shape than mine. If you're not laughing, then you know all too well that polymeric sand is really no joking topic.

Putting in jointing sand is typically the final stage of the project. We all know how easy it is to install - and sometimes to fail at. With all the new and improved polymeric sands flooding the market, how many have you tried? If you’ve answered none, then you are not alone. You have found the one product that works for you and have had success with. It’s hard to change the final step right before getting the final payment. However, many of these new products will outperform the “old” sands and save you time in the process. The key element is the watering procedure.

The most time-consuming step is that watering process. Many of the old products tell you to lightly mist a small area 2-3 times. That’s several opportunities for a mistake to happen. You have to also take into consideration the temperature, humidity, even if it is sunny or cloudy. Most of the new sands only require only a single watering application. Depending on the manufacturer, this could be due to polymer weight or reduction of dust particles. Now you have a few less chances to have an error. Make sure you apply enough water to fully saturate the joint, otherwise the joint will wash out at some point. I tell contractors to use the “shower” mode on the hose, and rinse off the bricks. The rest of the installation process is the same, but please read the instructions thoroughly. Even though the process may be similar, there could be slight differences between the manufacturers that could have consequences if not followed. Don’t be “that guy” that reads the directions after your IKEA cabinet is built upside down and inside out!

If you have a question about a process or a product, please call or stop in. If we don’t know the answers, we know the people that do. Let us help you solve whatever problems come your way over a cup of coffee, and maybe some really bad humor... I guess I won't be quitting my day job any time soon.

Bryan Pajak

How to install landscape lighting

Alliance bullet fixture

Outdoor accent lighting is one of the simplest ways to boost a landscape project from good to GREAT. Whether you are working with an all-new design or enhancing an established landscape, adding low-voltage lighting has a lot going for it.

We carry quality fixtures in a range of finishes to complement any style. Don't overlook using lighting in hardscape projects, too. How about path lighting integrated right into a paver walk? From deck lights to well lights, path lights to wall washes - there is a lighting solution for pretty much any situation. 

outdoor accent lighting

I've made a short video to show you just how easy it is to work with today's modern lighting products. Take a few minutes to watch - I think you'll be inspired to give outdoor lighting a place in your future designs.

David Reutter

Why you should tarp that load!

Tarped semi trailer

We hear it every day - "I don't need to tarp my load - I'm only going a short distance!". Well, there are good reasons why you should tarp every load, no matter how brief your travel time is.

Firstly, it's the law in Michigan that all loads must be secured so that debris can not fly off into the path of following vehicles​ or onto the roadway.

Another reason is that travel speeds expose your purchases to drying winds that WILL affect the foliage, maybe not while you are doing the planting, but the next day or week. Your customer is going to be on the phone to you wondering why his expensive landscaping is turning brown ​and you might be facing at the least, a counseling session - or a possible profit-killing replacement.

Don't be that guy! We are here with the know-how and the materials you need to secure and tarp your loads ​so that you can be on your way safely.

Steve Krogulecki

Preventing weeds in landscape beds

Treflan

Spring is here, now is the time for weed prevention, and Christensen’s has a few ways to prevent weeds and up-sell products to your customers for increased profit. Today I want to talk about Treflan and landscape fabric.

Treflan

Treflan is a pre-emergent herbicide for annual grasses and broadleaf weeds. Treflan can be used in new landscape beds, around trees, groundcover, and in established landscape beds. Now is the time to apply - before you see weeds emerging. Treflan creates a chemical barrier to germinating weeds. If there are root fragments in the bed, Treflan can’t stop them from coming up, so bed prep is important for good results. Be sure to follow the directions on the bag for coverage and how to apply. Also note the part of the directions about how the product must be watered in. This is an easy step that is key to your success when using this product.

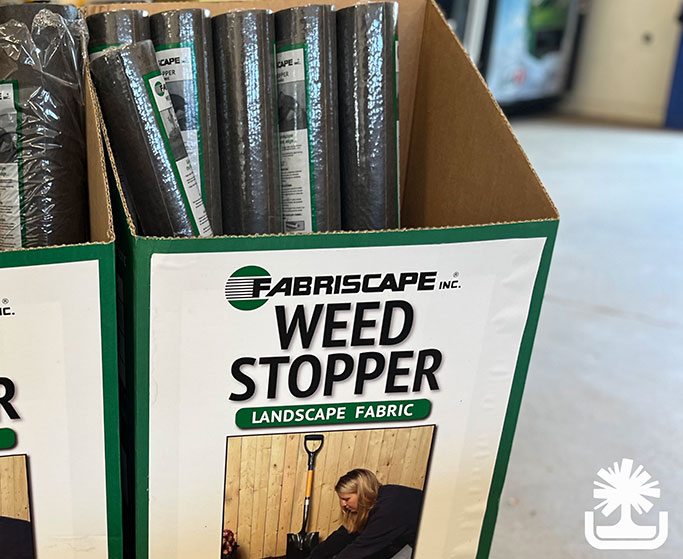
Another way is using landscape fabric. It stops approx. 95% of weed growth by creating a physical barrier to the weeds germinating. Fabric is useful under decorative stone in landscape beds. It also works very well as a filter fabric around drain tile and behind retaining walls. Christensen’s carries a wide range of fabric in sizes from 3’x 50’ to 10’ x 250’.

Please remember that both of these products only prevent weeds coming up from seed. Anything existing in landscape beds will not be stopped by Treflan or landscape fabric. Your only move is physically removing them or using a product like Killz All. But that’s another topic!

Applying Treflan is a good plan when installing mulch. It’s a value-added service resulting in great-looking beds and happy customers. And make sure that you check out Jermi’s mulch video from last week to get the best practices for installing mulch and making you more money.

David Krajniak